Lights, Camera, Action!

The Essentials
Watch this step by step video and review the sequence below

The Procedure
- Preparation
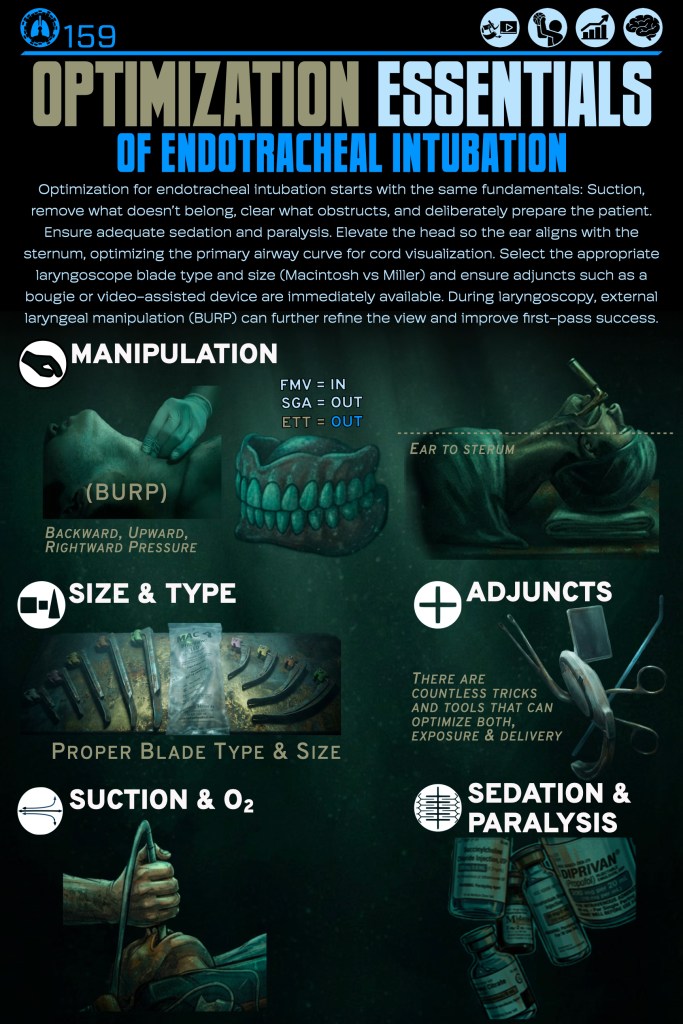
- Stand at the head, adjust the bed height for comfort (at or around your umbilicus).
- Patient sniffing/ear-to-sternal-notch, head midline, mouth accessible
- Laryngoscope in left hand, tube + stylet in right hand
- Open the mouth
- Use your right hand scissor: thumb on lower incisors/mandible, index on upper incisors/maxilla, spread to open
- If needed, pull the mandible down and forward to enlarge the oral aperture
- Insert the blade
- Insert the blade midline in the mouth
- Control the tongue as you advance
- Keep the blade midline once past the teeth
- Advance to your target
- Macintosh: advance until the tip sits in the vallecula
- Miller/straight: advance until the tip is under the epiglottis
- Lift to expose the larynx
- Lift up and away in the direction of the handle axis (toward the ceiling corner), no levering on teeth
- Small adjustments: slight withdrawal, re-center midline, increase mouth opening, optimize lift vector
- Optimize the view (pure mechanics)
- Maintain lift, then use one of:
- External laryngeal manipulation (your right hand or assistant) to bring the cords into view
- Slight blade depth change (too deep vs too shallow)
- Maintain lift, then use one of:
- Deliver the tube
- Bring tube in from the right corner of the mouth
- Keep the tube out of your line of sight, then advance toward the cords
- Pass the cords and seat
- If cords there is hangup rotate tube clockwise to help it pass (as needed)
- Advance until the cuff is beyond the vocal cords
- Stop at typical depth: ~21 cm (women), ~23 cm (men) at teeth/lip (adjust for patient size)
- If cords there is hangup rotate tube clockwise to help it pass (as needed)
- Remove hardware in sequence
- Hold tube steady
- Withdraw the laryngoscope carefully
- Remove stylet without moving tube position
- Inflate cuff
- Quick mechanical checks
- Tube secured at recorded depth
- Device removed, mouth clear, tube in place, ready for confirmation.
What’s Next
Find Or Click Me
Nice work! To keep going, visit the next poster in our pop-up training space, or continue online by clicking the poster here.
Click below to return to the Endotracheal Intubation menu.
You must be logged in to post a comment.